 Fire on the Kinzigsee part 1

This is the first part of a three-part AAR of scenario 4 from the World at War 85 Storming the Gap game. The remaining two parts of the AAR will be posted in the coming weeks.
US Setup
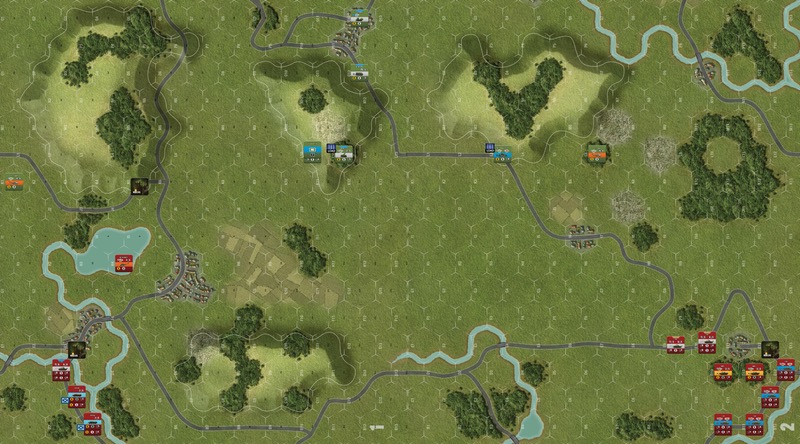
I spent a considerable amount of time working on my setup for the US forces in this scenario. I set out the forces and fiddled with the position of the various units. I even posted my plans on social media and got some very good feedback on it. The reason for all of this is that I think the US setup is critical in this scenario and I am not especially good at defensive setups in games. So here, for better or worse, is my initial deployment for the US forces.
Both of the Bradley CFVs are recon vehicles and are able to set up outside the standard area of command. They aren’t too far away from their HQ at the start but they can wander a bit and still not have to worry about making Out of Command roles. In the ‘real world’ you wouldn’t set up an AFV in the open like this but there are very few Wood/Hill hexes on the map that are at the edge of the hill. I want the vehicles to be able to Op Fire as soon as they see Soviets appear. The Hill still gives them +1 D6 in defence.

The M1/HQ are centrally located so I can spread the rest of the formation out as much as I can and also so the M1 has a wide range of possible attacks. The M-901 ITV is very far forward in the only good Wood/Hill hex because I want to ensure that I can get as much fire onto Soviet vehicles as I can and as soon as I can. The further forward you can stop the Soviets the better.
The SPM is tucked behind a hill. The HQ or one of the Bradleys can spot for it and it is safe there. The Chaparral is far to the rear in a city hex to ensure that the Soviet helicopter can’t take it out easily. Finally the two Cobras are starting the game in Hover mode to be able to fire and have been positioned to help maximize the amount of area that is being covered by ATGMs and also to make sure that if the Soviets decide to run through the eastern valley that there is at least one unit there to try to slow them down.
Turn 1
The first activation card drawn is one of the three End of Operations card. Thank goodness there are three. Following that is the American Fox 2/11 ACR. This is a bad result for the US as they are now spending an activation with no targets on the board. The US don’t move any units.
The first Soviet card, the 2/120 GMR, is drawn and the game can finally begin in earnest. The aim of these smaller mixed-unit Soviet formations is, in my grand scheme, to engage with the US forces and keep them busy while the T80s run north. This formation has some of the poorer Soviet vehicles and so I decide to move it onto the board via the roads at 1A4. A T-55 platoon runs up the road from A4 to the village in E3. The area is covered by blind hexes because of the villages between the vehicles and the US forces on the hills and the formation safely straddle the road.

Proving that Fate is a fickle mistress, the US Fox 2/11 ACR activation card is drawn again. They will be limited to just Op Fire this turn.
The Cobras are activated next. The Cobra in 1N7 changes modes to Flying and then moves to 1K1. This is outside of the regular range of the T-55s and there are no Soviet AA units on the board so it is safe there. The second Cobra, in 2N8, also enters Flying mode and moves to 2L6.
The Soviet 2/7 GTR activates next. The T-80s start flooding onto the map at 2A10 and then continue around the Woods to the east. As soon as the first tanks show up on the road the Bradley in 2L3 declares an Op Fire shot. It is a 13 hex range and the Bradley gets three hits but the T-80 shrugs off two of them and is just Disrupted. The Bradley fails its Ammo Check and is marked as Reloading. The rest of the tanks move into B10 and the M-901 ITV has LOS to that hex but it is too far away to take a shot.
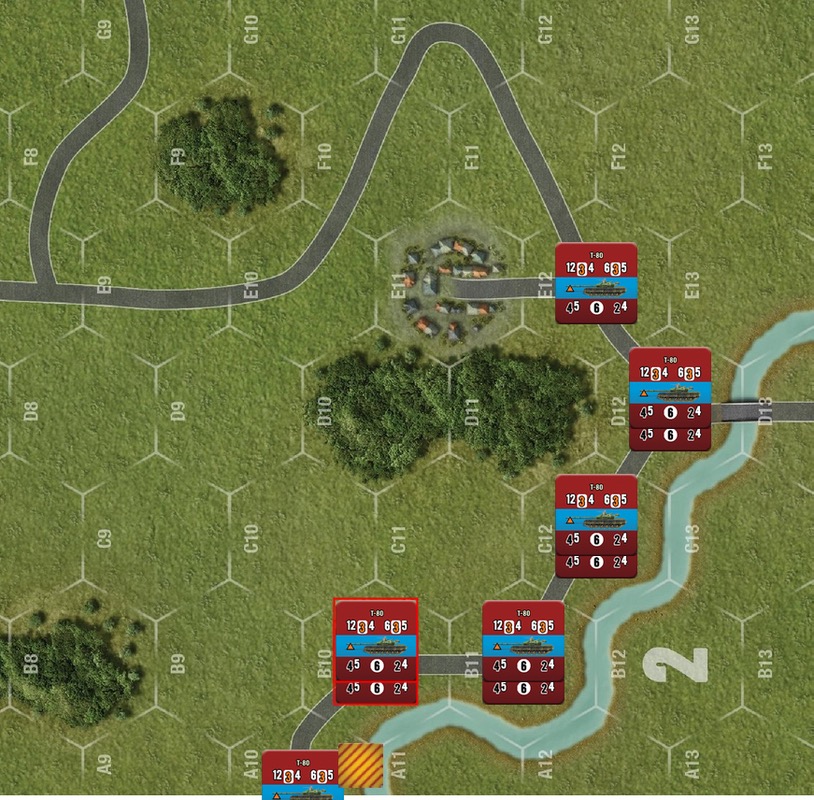
The Soviet 3/117th GMR is drawn next. Just what the US need, more Soviet vehicles. The road starting at 2A10 is now filled with T-80s so the formation enters the map at 2A9. Two platoons of T-62s enter the board and move to 2D9 where they are stopped by Op Fire from the M-901 ITV. It is long range but there are no more vehicles coming out so the decision is made to fire. The ITV misses and then also fails its Ammo Check. A single platoon of T-62s follow and it is stopped at 2C10 where the M1/HQ decide to Op Fire. The M1 only manages a single hit and the T-62 saves it and carries on. The rest of the formation comes on free of possible Op Fire.
 Up next is the Soviet Hind-E. The Hind-E enters the board at 1A6 and flies to 1F5 where it is stopped by the Chaparral to check LOS but the hill in front of it blocks. The Hind continues into G5 where the Bradley declares Op Fire. With the modifiers due to AA fire it misses and the Hind-E continues into H4 and fires back at the Bradley. Over water the Hind is at Height 1 and so the Bradley is still considered to be ‘up hill’ and will get a defensive bonus. Which matters not as the Hind misses horribly.
The Hind gets activated immediately though and this is probably not good for the Bradley. It changes into Hover mode and there are no US units that can fire on it. It then launches an ATGM towards the Bradley. It is most assuredly in Point Blank range and it hits with three dice. The Bradley doesn’t save any and explodes. The Hind passes its Ammo Check and is ready to blow up more vehicles next turn.
The American Cobras are activated next. The helo in 1K1 changes into Hover mode and fires an ATGM at the T-55 in 1E3. It gets three hits and the T-55 isn’t able to save and bursts into a radiant ball of flame. The Rubble/Fire check generates no change to the terrain and the Cobra makes its Ammo Check. The second Cobra in 2L6 has a clear LOS to a T-80 in 2E12. It changes into hover mode and sends an ATGM downrange at the Soviet tank. It hits with all four dice and the T-80 fails to save any and is destroyed. There are no other units in the hex to absorb the unallocated hit.
The Battlefield Event card is drawn next and the roll for it is an 8 – High Rate of Fire. Sadly for the Americans, the random die roll picks the Soviets for this event. The Soviets pick the Hind-E and it fires an ATGM at the M1/HQ in 1L10. It only gets a single hit and the M1 is easily able to save it.
A second End of Operations card is drawn and the turn comes to an end. The two cards for the America M1 formation are added to the deck, the Turn marker is advanced and we get ready for the second turn.
Turn 2
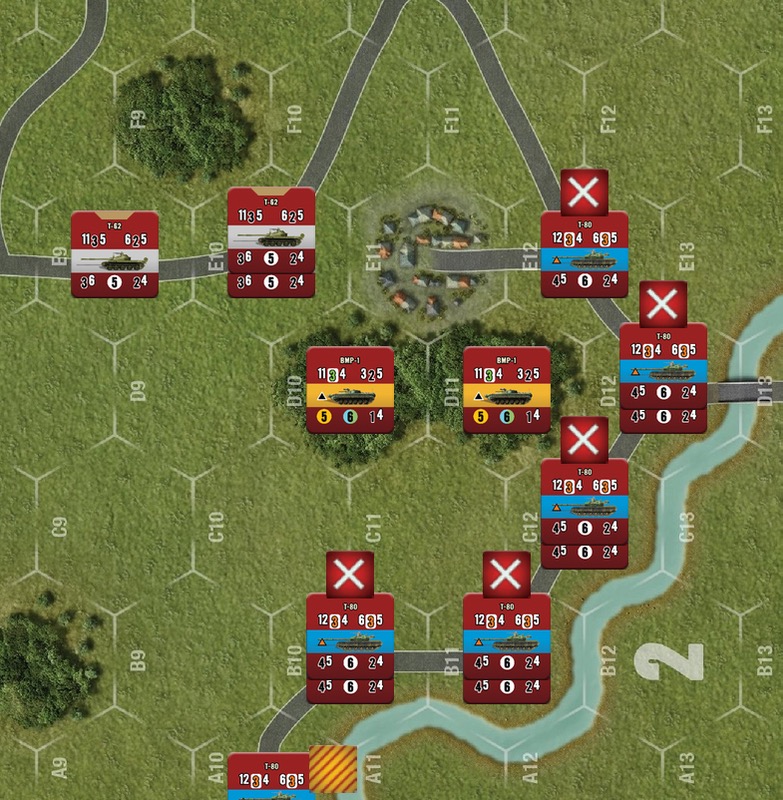
Well that was a good turn for the Soviets. Let’s see how things turn out for the US in this second turn. The first activation card drawn in for the Soviet 3/117th GMRR. The HQ is deployed onto the BMP in 2D11. The T-62 in 2E9 advances to 2F9 and is met with missile fire from the Cobra and explodes. One of the T-62s in 2E10 moves out and into 2G8 and fires on the Bradley in 2L3. It hits but the Bradley is able to save. The other T-62 follows suit and fires at the Bradley and Disrupts it. The BMP in 2D10 moves into the Woods in 2F9 and fires a Sagger at the Bradley which is hopelessly off target. It also fails its Ammo Check. The HQ/BMP in 2D11 moves into the village in 2E11 to get better cover.
The Fox 2/11 ACR activation card is drawn next. The HQ moves to the M-901 ITV in 1L11 to help it reload. The Bradley in 2L3 rallies and reloads but the ITV is still looking for a TOW reload. The HQ then calls in mortar fire from the SPM onto the T-62s in 2G8. One T-62 takes a minor hit that doesn’t even chip the armour and the second is untouched by the barrage.
The Chaparral in 1Q12 advances out of the village and onto the hill in 1N10 so it can try to see the Hind. The M1 in 1L10 advances into K10 and takes a long-range shot at a T-80 in 2B10. It amazingly gets two hits and the T-80 is unable to save any of them and is Disrupted and reduced. The Bradley in 2L3 fires a TOW at one of the T-62s in 2G8. It gets two hits and the T-62 does not save any of them. The Bradley does fails its Ammo Check though and is marked as Reloading. The ITV has no TOW to fire and no other targets are in range of its machine guns so it resigns itself to quietly waiting in the Woods.
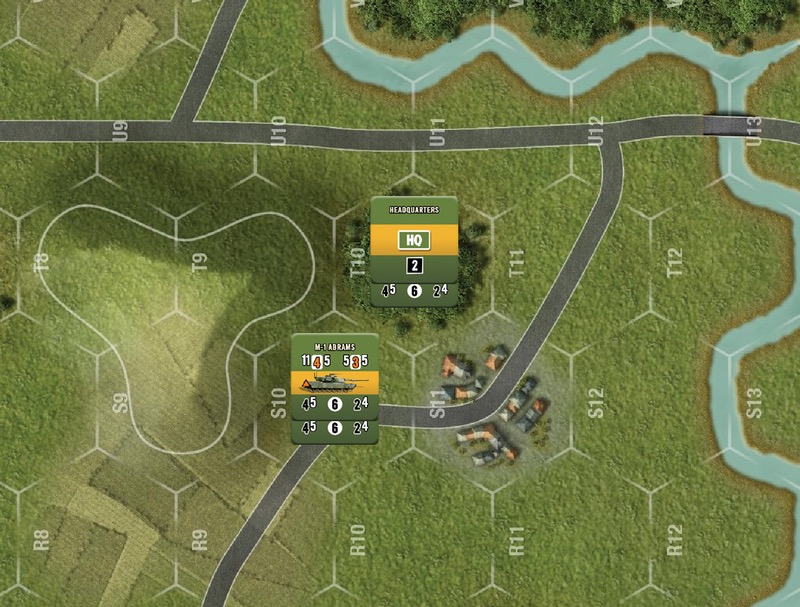
The M1s of the C/1-32/3 3rd AD are activated next. Seeing the abundance of Soviet vehicles near 2D12 the tanks decide to move onto the board from 2W10 and head into combat from there. One stack ends up in 2S10 and the HQ/M1 stack stop in 2T10
An End of Operations card is drawn next and then the Battlefield Event card. High Rate of Fire is rolled again and the Soviets win the ‘random’ die roll again. They choose the Hind-E once more and it launches a strike at the M1 in 1K11. The range to the M1 is Point Blank and the Hind hits three times. Even with the Reactive armour the M1 is disrupted.
Going next are the troops of the Soviet 2/120th GMRR who take a moment to wonder why their US counterparts have such odd designations. Their HQ is deployed to the BTR in 1C3. To the north of them a Cobra hovers menacingly in 1K1. One of the T-55s in 1D2 moves into 1E3 the Cobra decides not to Op Fire because of the city terrain. The T-55 then fires at the Cobra. It hits and Disrupts the helicopter. The second T-55 moves into 1F3 and also fires but misses. The two BTRs then race up the road. The HQ/BTR stops in 1G6 and the second halts in 1F3 with the T-55.
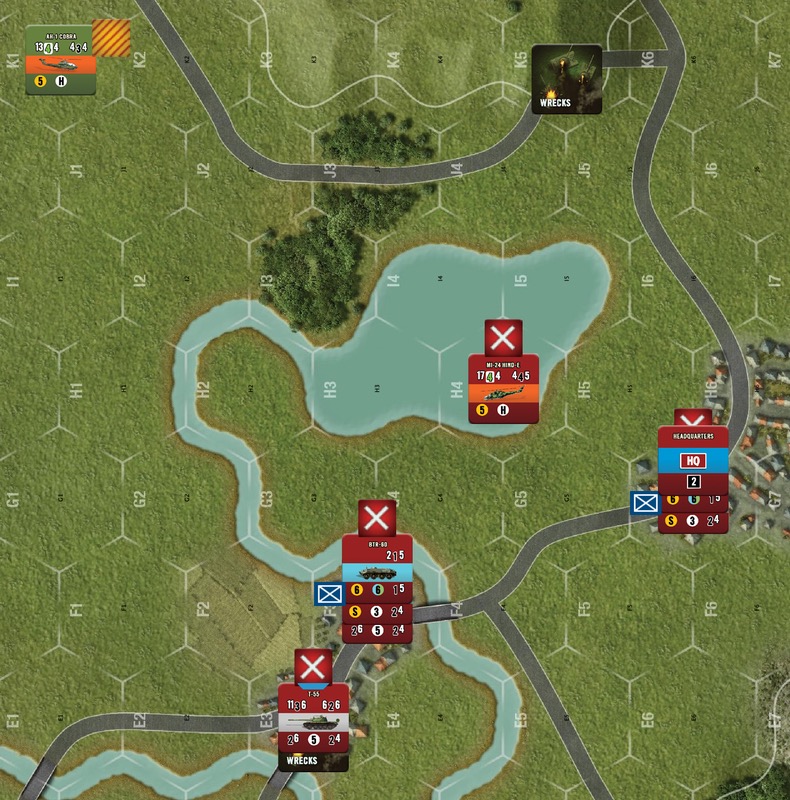
Fox 2/11 ACR is up next. The HQ decides to stay with the ITV and try to help it reload. The M1 rallies and the Bradley reloads but the ITV once again is unable to find any reloads for the TOW.
The HQ decides to call in mortar fire on the T-62s in 2G8. The barrage is on target but is only able to Disrupt one of the tanks. Now the entire stack has been Disrupted which should slow that formation down. The T-80s in 2B10 are just within range of the Bradley’s TOW launcher so it sends a round towards them. It gets two hits but the T-80 saves them both. This time the Bradley manages to make its Ammo Check.
The M1 still isn’t able to see any of the Soviet vehicles on the west side of the map and it doesn’t want to waste a shot at the Hind. Instead it targets one of the Disrupted T-62s. It manages to get two hits and the T-62 is destroyed. The Chaparral is now finally able to see the Hind and so it sends a pair of AIM-9 missiles towards it. They both hit but the Hind saves one and is Disrupted. The Chaparral has a Blue range and firepower value so it needs to take an Ammo Check which it fails. Looking back on this I don’t think the Chaparral actually had LOS due to the height of the Hind over water.
The T-80s of the 2/25th GTR are activated next. The HQ is taken from the Holding Box and deployed with the Disrupted T-80 in 2A10. The reduced tank in 2B10 rallies as does the T-80 in 1A10. These tanks have no other goal than to get north as fast as they can and so they all move north. The HQ/T-80 stack moves in next to the wreck to get some additional cover.

The HInd-E is activated next. It fails to rally and enters Flying Mode. There are no US troops left to Op Fire on it so it falls back to 1Bt where the hill and woods adjacent to it block LOS to it.
The next card drawn is an End of Operations card which draws turn 2 to a close.
The US M1s are on the board but they are so far north that I can’t get them in the image.

You can continue this AAR in part 2.

Leave a Reply